ADC using interrupt in STM32
AS mentioned in the previous posts that there are many ways to write a program for ADC in STM32 like PollForConversion, interrupt and DMA. This post is going to cover the interrupt method. To see the use of PollForConversion, go to stm32-adc-using-hal or adc-in-stm32-using-hal
An interrupt is a signal sent to the CPU which indicates that a system event has occurred, which needs immediate attention. In case of an interrupt got triggered, CPU stops whatever it is doing and executes a function first. This function is a small piece of code also known as ISR(Interrupt Service Routine).
Interrupt is widely used in embedded systems to ensure that no CPU time is wasted 'polling' the sensor for the data rather an interrupt is triggered whenever the data is available to be read from the sensor.
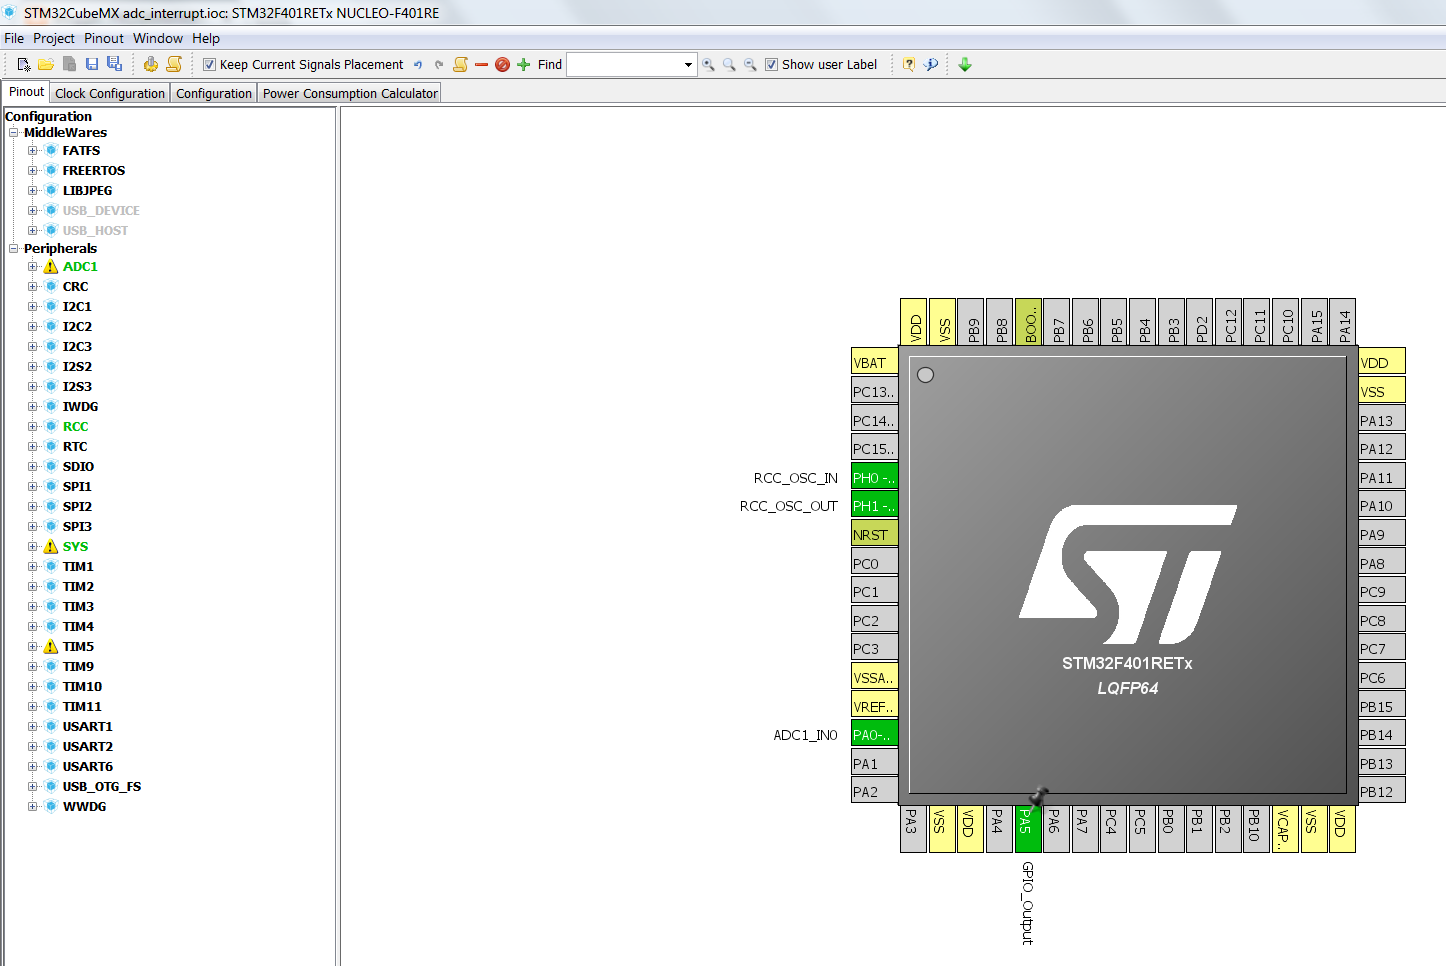
CubeMx Setup
PA5 is selected as GPIO Output and a LED is connected to it to show how the interrupt method doesn't affect the normal working of the controller.

ADC1 channel 0 is selected.


An interrupt is a signal sent to the CPU which indicates that a system event has occurred, which needs immediate attention. In case of an interrupt got triggered, CPU stops whatever it is doing and executes a function first. This function is a small piece of code also known as ISR(Interrupt Service Routine).
Interrupt is widely used in embedded systems to ensure that no CPU time is wasted 'polling' the sensor for the data rather an interrupt is triggered whenever the data is available to be read from the sensor.
CubeMx Setup
PA5 is selected as GPIO Output and a LED is connected to it to show how the interrupt method doesn't affect the normal working of the controller.
ADC1 channel 0 is selected.

Here Resolution of adc is selected as 12 bit
Scan conversion mode is disabled because only one channel is selected and sequence is not needed at this time.
Continuous conversion mode is enabled as we want adc to work continuously.
DMA continuous request is disabled as we are not using DMA here.
NEXT Go to NVIC Settings tab and check the "ADC global interrupt".

Generate the project and open it.
Let's begin by writing a Conversion complete callback function. This function will be called whenever ADC finishes the conversion and data is ready to be read.
__weak void HAL_ADC_ConvCpltCallback(ADC_HandleTypeDef* hadc)
is defined as weak function in hal_adc.c We will use this as a conversion complete callback function
void HAL_ADC_ConvtCpltCallback (ADC_HandleTypeDef *hadc)
{
 value = HAL_ADC_GetValue (&hadc1);
}
Whenever the conversion is complete, above function is executed. The value of ADC will be stored in the value variable. After the completion of the function, control will go back to main function.
In order to start the ADC in interrupt mode, we need to use
HAL_ADC_Start_IT (&hadc1);
RESULT :-
I will show the result in STMstudio. To get started, open STMstudio and click import variables

Open the project location and look for *.acf file.

Now Select the variables, you want to track. I will select adc_val.

Right click on adc_val and select send to var viewer.

You can select any type of graph from display. Connect the board and hit start.

Above graph is the value of IR sensor without any obstacle. On bringing an object near to the sensor, the value decreases

These are the changes observed in ADC value. But the LED will keep blinking every 500 ms as programmed. Any delay in ADC conversion will not affect the rest of the code.
TO Download full code, visit
CHECK OUT THE VIDEO BELOW
ADC using interrupt in STM32
 Reviewed by Controllerstech
on
August 14, 2017
Rating:
Reviewed by Controllerstech
on
August 14, 2017
Rating:
Reviewed by Controllerstech
on
August 14, 2017
Rating:


No comments: